Installing Koken on Docker
My photo website is running Koken, which bills itself as a "content management and web site publishing for photographers".
I recently had some server issues, so I ended up reinstalling the entire site from scratch. On a good note, it allowed me to test my backup strategy—fortunately it worked.
So here's my take on how to install Koken via Docker. There are official instructions here, but it is a bit light on details, and skips things like running Koken as a service.
Getting a VM
I use DigitalOcean (here's a referral link), but there are countless other VM providers like Vultr or Linode, and larger platforms like AWS, Google Cloud Platform, and Azure.
DigitalOcean offers One-click apps, which are basically VM images with pre-installed applications. There's one for Ubuntu 16.04 with Docker installed.
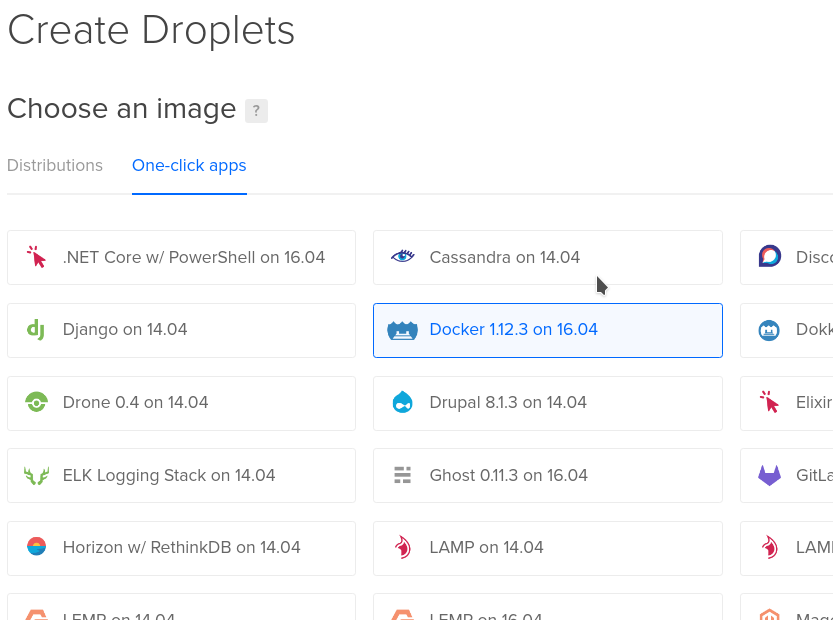
Of course you can can always just create any new VM and install Docker manually.
I'm running the smallest VM I could, which is 512MB RAM and 1 vCPU. It may not be the snappiest, especially when generating new thumbnails, but it gets the job done.
After creating the VM, you'll want to do some initial server setup: create an account, disable root login, enable a firewall. Whether or not you created a VM on DigitalOcean, they have pretty good guides that walk through all of that: Initial Server Setup with Ubuntu 16.04.
Installation
First, we're going to download the official koken-lemp Docker image:
docker pull koken/koken-lemp
The source for this container is available on GitHub here.
Next, create two folders on the VM to store website and database data:
mkdir -p /data/koken/www
mkdir -p /data/koken/mysql
These will be mapped to the standard Nginx and MySQL folders in the Docker container, so you can easily access this data for backups.
Now we can launch the container manually to ensure it works:
docker run --name koken_server -p 80:8080 -v /data/koken/www:/usr/share/nginx/www -v /data/koken/mysql:/var/lib/mysql -d koken/koken-lemp /sbin/my_init
Let's break this down: It's telling Docker to run a new container, with name koken_server. We'll be able to use that name later to access the container. The argument -p 80:8080 is mapping from port 8080 in the container, to port 80 on the host VM. This will let you or others access the Koken website over port 80. Then there are two -v arguments, which map folders on the host VM to folders inside the container. As I mentioned above, this will make it easier to access data in those folders.
Next, -d koken/koken-lemp is telling Docker which image to run. This is the same one we pulled previously—if you didn't pull it earlier, Docker will download it now. And finally, /sbin/my_init is the startup script for the image.
If the above command worked without errors, there should be a new Docker container running on your server. You can check for running containers with:
docker ps
If the output of this command is empty, then something must have gone wrong. You can access Docker logs for the container using its name:
docker logs koken_server
On the other hand, if everything worked and the container is running, you should be able to access Koken at the public URL for the server. Open it in a browser and complete the installation process.
Running as a Service
Running the Docker container manually works for testing, but if anything happens or the server is restarted, you'll have to login and start it again. So instead of manually, we can set it up to run as a service.
Before doing this, you'll want to kill and removing the running container:
docker kill koken_server
docker rm koken_server
Don't worry, this doesn't delete your data, as it's synced to the /data/koken/ folder.
How to achieve this depends on the specific OS being run: Ubuntu 14.04 uses Upstart, whereas Ubuntu 16.04 uses Systemd.
Using Upstart
Create a new file, /etc/init/docker-koken.conf:
# /etc/init/docker-koken.conf
description "Koken Docker Container"
author "Dave Bauman"
start on filesystem and started docker
stop on runlevel [!2345]
respawn
script
  /usr/bin/docker run --name koken_server -p 80:8080 -v /data/koken/www:/usr/share/nginx/www -v /data/koken/mysql:/var/lib/mysql -d koken/koken-lemp /sbin/my_init
end script
This has the same Docker command we run manually, but wrapped up in an Upstart script that triggers after Docker starts.
You can launch the service immediately with:
sudo start docker-koken
You can use docker ps to check that the container launched without issues, and verify by loading the website.
Using Systemd
Create a new file, /etc/systemd/system/docker-koken.service:
[Unit]
Description=Koken Docker Container
Author=Dave Bauman
Requires=docker.service
After=docker.service

[Service]
Restart=always
ExecStart=/usr/bin/docker run --name koken_server -p 8080:8080 -v /data/koken/www:/usr/share/nginx/www -v /data/koken/mysql:/var/lib/mysql -d koken/koken-lemp /sbin/my_init
ExecStop=/usr/bin/docker stop -t 2 koken_server
ExecStopPost=/usr/bin/docker rm -f koken_server

[Install]
WantedBy=default.target
Like the Upstart script, this too runs the same Docker command, and triggers after Docker starts.
Enable the service to start on boot:
sudo systemctl enable docker-koken.service
And launch it immediately:
sudo systemctl start docker-koken.service
Again, use docker ps to check that the container launched without issues, and verify by loading the website.
Backup
Backing up the Koken data is critical to avoid losing data, and using Docker only makes it slightly more complicated. The mapped data volumes allow you to access the data directly from the host VM.
The website data can be backed up directly, as it's mostly just PHP files and images. All the uploaded images go into /data/koken/www/storage, so backing up this folder ensures safety of all the photos. But the metadata, like titles, tags, categories, etc., are stored in the MySQL database.
Copying the MySQL files directly may cause issues unless the MySQL server is shutdown beforehand. So I'm using mysqldump to output the contents of the database to a script. The only complication here is that this application needs to be run from inside the container.
Fortunately, recent version of Docker added docker exec which makes this easy:
docker exec -it koken_server mysqldump -ukoken -pPASSWORD koken --single-transaction --routines --triggers > /data/koken/mysql/backup.sql
This command enters the koken_server container and launches mysqldump. Replace the word PASSWORD above, with the auto-generated password the installation script created. You can find it inside /data/koken/www/storage/configuration/database.php.
And finally, the output of mysqldump is piped into a single file for easy backup.
Restoring the database from the backup is just the opposite:
docker exec -it koken_server /bin/bash
mysql -u koken -pPASSWORD koken < /var/lib/mysql/backup.sql
This does it in two steps, first by launching the bash shell inside the container, then piping the backup script into the mysql command.
Finale
Using Docker makes installing Koken pretty easy, as the official Docker image comes with Nginx, PHP, MySQL already installed and configured. If you use the official instructions it's even easier as they include a single bash script to orchestrate the entire thing. It's basically the same thing, but I prefer to run it as a service to ensure it stays up.
I also saw a fork of the default Docker repo, which removes MySQL so it can be run as a separate container. This is where Docker starts to get more interesting, as you can compose applications out of multiple containers, or co-locate multiple applications on the same server. I imagine this option would be appealing if you wanted to share a MySQL instance with multiple applications on the same server.